Wednesday, December 15, 2010

Chef and encrypted data bags.

As part of rolling out Chef at the new gig, we had a choice - stand up our own Chef server and maintain it or use the Opscode platform. From a cost perspective, the 50 node platform cost was pretty much break even with standing up another EC2 instance of our own. The upshot was that I didn't have to maintain it.


However, part of due diligence was making sure everything was covered from a security perspective. We use quite a few hosted/SaaS tools but this one had the biggest possible security risk. The biggest concern is dealing with sensitive data such as database passwords and AWS credentials. The Opscode platform as a whole is secure. It makes heavy use of SSL not only for transport layer encryption but also for authentication and authorization. That wasn't a concern. What was a concern was what should happen if a copy of our CouchDB database fell into the wrong hands or a "site reliability engineer" situation happened. That's where the concept of "encrypted data bags" came from for me.


Atlanta Chef Hack Day

I had the awesome opportunity to stop by the Atlanta Chef Hack day this past weekend. I couldn't stay long and came in fairly late in the afternoon. However I happened to come in right at the time that @botchagalupe (John Willis) and @schisamo (Seth Chisamore) brought up encrypted data bags. Of course, Willis proceeded to turn around and put me on the spot. After explaining the above use case, we all threw out some ideas but I think everyone came to the conclusion that it's a tough nut to crack with a shitload of gotchas.


Before I left, I got a chance to talk with @sfalcon (Seth Falcon) about his ideas. While he totally understood the use cases and mentioned that other people had asked about it as well, he had a few ideas but nothing that stood out as the best way.


So what are the options? I'm going to list a few here but I wanted to discuss a little bit about the security domain we're dealing with and what inherent holes exist.


Reality Checks

  • Nothing is totally secure.

          Deal with it. Even though it's a remote chance in hell, your keys and/or data are going to be decrypted somewhere at some point in time. The type of information we need to read, unfortunately, can't use a one-way encryption algo like MD5 or SHA because we NEED to know what the data actually is. I need that MySQL password to provide to my application server to talk to the database. That means it has to be decrypted and during that process and during usage of that data, it's going to exist in a possible place that it can be snagged.

  • You don't need to encrypt everything

          You need to understand what exactly needs to be encrypted and why. Yes, there's the "200k winter coats to troops" scenario and every bit of information you expose provides additional material for an attack vector but really think about what you need to encrypt. Application database account usernames? Probably not. The passwords for those accounts? Yes. Consider the "value" of the data you're considering encrypting.

  • Don't forget the "human" factor

          So you've got this amazing library worked out, added it to your cookbooks and you're only encrypting what you need to really encrypt. Then some idiot puts the decryption key on the wiki or the master password is 5 alphabetical characters. As we often said when I was a kid, "Smooth move, exlax"

  • There might be another way

          There might be another way to approach the issue. Make sure you've looked at all the options.


Our Use Case

So understanding that, we can narrow down our focus a bit. Let's use the use case of our applications database password because it's a simple enough case. It's a single string.


Now in a perfect world, Opscode would encrypt each CouchDB database with customer specific credentials (like say an organizational level client cert) and discards the credentials once you've downloaded them.


That's our first gotcha - What happens when the customer loses the key? All that data is now lost to the world. 


But let's assume you were smart and kept a backup copy of the key in a secure location. There's another gotcha inherent in the platform itself - Chef Solr. If that entire database is encrypted, unless Opscode HAS the key, they can't index the data with Solr and all those handy searches you're using in your recipes to pull in all your users is gone. Now you'll have to manage the map/reduce views yourself and deal with the performance impact where you don't have one of those views in place.


So that option is out. The Chef server has to be able to see the data to actually work.


What about a master key? That has several problems.


You have to store the key somewhere accessible to the client (i.e. the client chef.rb or in an external file that your recipes can read to decrypt those data bag items).

  • How do you distribute the master key to the clients?
  • How do you revoke the master key to the clients and how does that affect future runs? See the previous line - how do you then distribute the updated key?


I'm sure someone just said "I'll put it in a data bag" and then promptly smacked themselves in the head. Chicken - meet Egg. Or is it the other way around?


You could have the Chef client ASK you for the key (remember apache SSL startups where the startup script required a password? Yeah, that sucked.


Going the Master Key Route

So let's assume that we want to go this route and use a master key. We know we can't store in with Opscode because that defeats the purpose. We need a way to distribute the master key to the clients so they can decrypt the data so how do we do it?


If you're using Amazon, you might say "I'll store it in S3 or on an EBS volume". That's great! Where do you store the AWS credentials? "In a data ba...oh wait. I've seen this movie before, haven't I?"


So we've come to the conclusion that we must store the master key somewhere ourselves locally available to the client. Depending on your platforming, you have a few options:

  • Make it part of the base AMI
  • Make it part of your kickstart script
  • Make it part of your vmware image


All of those are acceptable but they don't deal with updating/revocation. Creating new AMIs is a pain in the ass and you have to update all your scripts with new AMI ids when you do that. Golden images are never golden. Do you really want to rekick a box just to update the key?


Now we realize we have to make it dynamic. You could make it a part of a startup script in the AMI, first boot of the image or the like. Essentially, "when you startup, go here and grab this key". Of course now you've got to maintain a server to distribute the information and you probably want two of them just to be safe, right? Now we're spreading our key around again.


This is starting to look like an antipattern.


But let's just say we got ALL of that worked out. We have a simple easy way for clients to get and maintain the key. It works and your data is stored "securely" and you feel comfortable with it.


Then your master key gets compromised. No problem, you think. I'll just use my handy update mechanism to update the keys on all the clients and...shit...now I've got to re-encrypt EVERYTHING and re-upload my data bags. Where the hell is the plaintext of those passwords again? This is getting complicated, no?


So what's the answer? Is there one? Obviously, if you were that hypersensitive to the security implications you'd just run your own server anyway. You still have the human factor and backups can still be stolen but that's an issue outside of Chef as a tool. You just move the security up the stack a bit. You've got to secure the Chef server itself. But can you still use the Opscode platform? I think so. With careful deliberation and structure, you can reach a happy point that allows you to still automate your infrastructure with Chef (or some other tool) and host the data off-site.


Some options

Certmaster


Certmaster spun out of the Func project. It's essentially an SSL certificate server at the base. It's another thing you have to manage but it can handle all the revocation and distribution issues.

Riak


This is one idea I came up with tonight. The idea is that you run a very small Riak instance on all the nodes that require the ability to decrypt the data. Every node is a part of the same cluster and this can all be easily managed with Chef. It will probably have a single bucket containing the master key. You get the fault tolerance built in and you can pull the keys as part of your recipe using basic Chef resources. Resource utilization on the box should be VERY low for the erlang processes. You'll have a bit more network chatter as the intra-cluster gossip goes on though. Revocation is still an issue but that's VERY easily managed since it's a simple HTTP put to update. And while the data is easily accessible to anyone who can get access to the box, you should consider yourself "proper f'cked" if that happens anyway.


But you still have the issue of re-encrypting the databags should that need to happen. My best suggestion is to store the encrypted values in a single data bag and add a rake task that does the encryption/revocation for you. Then you minimize the impact of something that simply should not need to happen that often.


Another option is to still use Riak but store the credentials themselves (as opposed to a decryption key) and pull them in when the client runs. The concern I have there is how that affects idempotence and would it cause the recipe to be run every single time just because it can't checksum properly? You probably get around this with a file on the filesystem telling Chef to skip the update using "not_if". 


Wrap Up


As you can see, there's no silver bullet here. Right now I have two needs, storing credentials for S3/EBS access and storing database passwords. That's it. We don't use passwords for user accounts at all. You can't even use password authentication with SSH on our servers. If I don't have your pubkey in the users data bag, you can't log in.  


The AWS credentials are slowly becoming less of an issue. With the Identity Access beta product, I can create limited use keys that can only do certain things and grant them access to specific AWS products. I can make it a part of node creation to generate that access programatically. That means I still have the database credentials issue though. For that, I'm thinking that the startup script for an appserver, for instance, will just have to pull the credentials from Riak (or whatever central location you choose) and update a JNDI string. It spreads your configuration data out a bit but these things shouldn't need to change to often and with proper documented process you know exactly how to update it.


One thing that this whole thing causes is that it begins to break down the ability to FULLY automate everything. I don't like running the knife command to do things. I want to be able to programatically run the same thing that Knife does from my own scripts. I suppose I could simply popen and run the knife commands but shelling out always feels like an anti-pattern to me.


I'd love some feedback on how other people are addressing the same issues!


Thursday, December 2, 2010

Automating EBS Snapshot validation with @fog - Part 2

This is part 2 in a series of posts I'm doing - You can read part 1 here

Getting started

I'm not going to go into too much detail on how to get started with Fog. There's plenty of documentation on the github repo (protip: read the test cases) and Wesley a.k.a @geemus has done some awesome screencasts. I'm going to assume at this point that you've at least got Fog installed, have an AWS account set up and have Fog talking to it. The best way to verify is to create your .fog yaml file, start the fog command line tool and start looking at some of the collections available to you.

For the purpose of this series of posts, I've actually created a small script that you can use to spin up two ec2 instances (m1.small) running CentOS 5.5, create four (4) 5GB EBS volumes and attach them to the first instance. In addition to the fog gem, I also have awesome_print installed and use it in place of prettyprint. This is, of course, optional but you should be aware.

WARNING: The stuff I'm about to show you will cost you money. I tried to stick to minimal resource usage but please be aware you need to clean up after yourself. If, at any time, you feel like you can't follow along with the code or something isn't working - terminate your instances/volumes/resources using the control panel or command-line tools. PLEASE DO NOT JUST SIMPLY RUN THESE SCRIPTS WITHOUT UNDERSTANDING THEM.

The setup script

The full setup script is available as gist on github - https://gist.github.com/724912#file_fog_ebs_demo_setup.rb

Things to note:

  • Change the key_name to a valid key pair you have registered with EC2
  • There's a stopping point halfway down after the EBS volumes are created. You should actually stop there and read the comments.
  • You can run everything inside of an irb session if you like.

The first part of the setup script does some basic work for you - it reads in your fog configuration file (~/.fog) and creates an object you can work with (AWS). As I mentioned earlier, we're creating two servers - hdb and tdb. HDB is the master server - say your production MySQL database. TDB is the box which will be running as the validation of the snapshots.

In the Fog world, there are two big concepts - models and collections. Regardless of cloud provider, there are typically at least two models available - Compute and Storage. Collections are data objects under a given model. For instance in the AWS world, you might have under the Compute model - servers, volumes, snapshots or addresses. One thing that's nice about Fog is that, once you establish your connection to your given cloud, most of your interactions are the same across cloud providers. In the example above, I've created a connection with Amazon using my credentials and have used that Compute connection to create two new servers - hdb and tdb. Notice the options I pass in when I instantiate those servers.

  • image_id
  • key_name

If I wanted to make these boxes bigger, I might also pass in 'flavor_id'. If you're running the above code in an irb session, you might see something like the following when you instantiate those servers: Not all of the fields may be available depending on how long it takes Amazon to spin up the instance. The above shot is after the instance was up and running. For instance, when you first created 'tdb', you'll probably see "state" as pending for quite some time. Fog has a nice helper method for all models call 'wait_for'. In my case I could do:

tdb.wait_for { print "."; ready?}

And it would print dots across the screen until the instance is ready for me to log in. At the end, it will tell you the amount of time you spent waiting. Very handy. You have direct access to all of the attributes above via the instance 'tdb' or 'hdb'. You can use 'tdb.dns_name' to get the dns name for use in other parts of your script for example. In my case, after the server 'hdb' is up and running, I now want to create the four 5GB EBS volumes and attach them to the instance:

I've provided four device names (sdi through sdl) and I'm using the "volumes" collection to create them (AWS.volumes.new). As I mentioned earlier, all of the attributes for 'hdb' and 'tdb' are accessible by name. In this case, I have to create my volumes in the same availability zone as the hdb instance. Since I didn't specify where to create it when I started it, Amazon has graciously chosen 'us-east-1d' for me. As you can see, I can easily access that as 'hdb.availability_zone' and pass it to the volume creation section. I've also specified that the volume should be 5GB in size.

At the point where I've created the volume with '.new' it hasn't actually been created. I want to bind it to a server first so I simply set the volume.server attribute equal to my server object. Then I 'save' it. If I were to log into my running instance, I'd probably see something like this in the 'dmesg' output now:

sdj: unknown partition table

sdk: unknown partition table

sdl: unknown partition table

sdi: unknown partition table

As you can see from the comments in the full file, you should stop at this point and setup the volumes on your instance. In my case, I used mdadm and created a RAID0 array using those four volumes. I then formatted them, made a directory and mounted the md0 device to that directory. If you look, you should now have an additional 20GB of free space mounted on /data. Here I might make this the data directory for mysql (which is the case in our production environment). Let's just pretend you've done all that. I simulated it with a few text files and a quick 1GB dd. We'll consider that the point-in-time that we want to snapshot from. Since there's no actual constant data stream going to the volumes, I can assume for this exercise that we've just locked mysql, flushed everything and frozen the XFS filesystem. Let's make our snapshots. In this case I'm going to be using Fog to do the snapshots but in our real environment we're using the ec2-consistent-snapshot script from Aelastic. First let's take a look at the state of the hdb object:

Notice that the 'block_device_mapping' attribute now consist of an array of hashes. Each hash is a subset of the data about the volume attached to it. If you aren't seeing this, you might have to run 'hdb.reload' to refresh the state of the object. To create our snapshots, we're going to iterate over the block_device_mapping attribute and use the 'snapshots' collection to make those snapshots:

One thing you'll notice is that I'm being fairly explicity here. I could shorthand and chain many of these method calls but for clarity, I'm not.

And now we have 4 snapshots available to us. The process is fairly instant but sometimes it can lag. As always, you should check the status via the .state attribute of an object to verify that it's ready for the next step. Here's a shot of our snapshots right now:

That's the end of Part 2. In the next part, we'll have a full fledged script that does the work of making the snapshots usable on the 'tdb' instance.

Automating EBS Snapshot validation with @fog - Part 1

Background

One thing that's very exciting about the new company is that I'm getting to use quite a bit of Ruby and also the fact that we're entirely hosted on Amazon Web Services. We currently leverage EBS, ELB, EC2 S3 and CloudFront for our environment. The last time I used AWS in a professional setting, they didn't even have Elastic IPs much less EBS with snapshots and all the nice stuff that makes it viable for a production environment. I did, however, manage to keep abreast of changes using my own personal AWS account.

Fog

Of course the combination of Ruby and AWS really means one thing - Fog. And lot's of it.

When EngineYard announced the sponsorship of the project, I dove headlong into the code base and spent what time I could trying to contribute code back. The half-assed GoGrid code in there right now? Sadly, some of it is mine. Time is hard to come by these days. Regardless, I'm no stranger to Fog and when I had to dive into the environment and start getting it documented and automated, Fog was the first tool I pulled out and when the challenge of verifying our EBS snapshots (of which we're currently at a little over 700), I had no choice but to automate it.

Environment

A little bit about the environment:

  • - A total of 9 EBS volumes are snapshotted each day
  • - 8 of the EBS volumes are actually raid0 mysql data stores across two DB servers (so 4 disks on one/4 disks on another)
  • - The remaining EBS volume is a single mysql data volume
  • - Filesystem is XFS and backups are done using the Aleastic ec2-consistent-snapshot script (which currently doesn't support tags)

The end result of this is to establish a rolling set of validated snapshots. 7 daily, 3 weekly, 2 monthly. Fun!

Mapping It Out

Here was the attack plan I came up with:

  • - Identify snapshots and groupings where appropriate (raid0, remember?)
  • - create volumes from snapshots
  • - create an m1.xlarge EC2 instance to test the snapshots
  • - attach volume groups to the test instance
  • - assemble the array on the test instance
  • - start MySQL using the snapshotted data directory
  • - run some validation queries using some timestamp columns in our schema
  • - stop MySQL, unmount volume, stop the array
  • - detach and destroy the volumes from the test instance
  • - tag the snapshots as "verified"
  • - roll off any old snapshots based on retention policy
  • - automate all of the above!

I've got lots of code samples and screenshots so I'm breaking this up into multiple posts. Hopefully part 2 will be up some time tomorrow

Tuesday, November 9, 2010

Fix it or Kick It and the ten minute maxim

One of the things I brought up in my presentation to the Atlanta DevOps group was the concept of "Payment". One of the arguments that people like to trot out when you suggest an operational shift is that "We can't afford to change right now". My argument is that you CAN'T afford to change. It's going to cost you more in the long run. The problem is that in many situations, the cost is detached from the original event.

Take testing. Let's assume you don't make unit testing an enforced part of your development cycle. There are tons of reasons people do this but much of it revolves around time. We don't have time to write tests. We don't have time to wait for tests to run. We've heard them all. Sure you get lucky. Maybe things go out the door with no discernible bugs. But what happens 3 weeks down the road when the same bug that you solved 6 weeks ago crops up again? It's hard to measure the cost when it's so far removed from the origination.

Configuration management is the same way. I'm not going to lie. Configuration management is a pain in the ass especially if you didn't make it a core concept from inception. You have to think about your infrastructure a bit. You'll have to duplicate work initially (i.e. templating config files). It's not easy but it pays off in the long run. However as with so many things, the cost is detached from the original purchase.

Fix it?

Walk with me into my imagination. A scary place where a server has started to misbehave. What's your initial thought? What's the first thing you do? You've seen this movie and done this interview:

  • log on to the box
  • perform troubleshooting
  • think
  • perform troubleshooting
  • call vendor support (if it's an option)
  • update trouble ticket system
  • wait
  • troubleshoot
  • run vendor diag tools

What's the cost of all that work? What's the cost of that downtime? Let's be generous. Let's assume this is a physical server and you paid for 24x7x4 hardware support and a big old RHEL subscription. How much time would you spend on each task? What's the turn around time to getting that server back into production?

Let's say that the problem was resolved WITHOUT needing replacement hardware but came in at the four hour mark. That's three hours that the server was costing you money instead of making you money. Assuming a standard SA salary of $75k/year in Georgia, that works out to $150. That's just doing a base salary conversion not calculating all the other overhead associated with staffing an employee. What if that person consulted with someone else during that time, a coworker at the same rate, for two of those hours. $225. Not too bad, right? Still a tangible cost. Maybe one you're willing to eat.

But let's assume the end result was to wipe and reinstall. Let's say it takes another hour to get back to operational status. Woops. Forgot to make that tweek to Apache that we made a few weeks ago. Let's spend an hour troubleshooting that.

But we're just talking man power at this point. This doesn't even take into account end-user productivity, loss of customers from degraded performance or any host of issues. God forbid that someone misses something that causes problems to other parts of the environment (like not setting the clock and inserting invalid timestamps into the database or something. Forget that you shouldn't let your app server handle timestamps). Now there's cleanup. All told your people spent 5 hours to get this server back into production while you've been running in a degraded state. What does that mean when our LOB is financial services and we have an SLA and attached penalties? I'm going to go easy on you and let you off with 10k per hour of degraded performance.

Get ready to credit someone $50k or worse cut a physical check.

Kick it!

Now I'm sure everyone is thinking about things like having enough capacity to maintain your SLA even with the loss of one or two nodes but be honest. How many companies actually let you do that? Companies will cut corners. They roll the dice or worse have a misunderstanding of HA versus capacity planning.

What you should have done from the start was kick the box. By kicking the box, I mean performing the equivalent of a kickstart or jumpstart. You should, at ANY time, be able to reinstall a box with no user interaction (other than the action of kicking it) and return it to service in 10 minutes. I'll give you 15 minutes for good measure and bad cabling. My RHEL/CentOS kickstarts are done in 6 minutes on my home network and most of that time is the physical hardware power cycling. With virtualization you don't even have a discernible bootup time.

Unit testing for servers

I'll go even farther. You should be wiping at least one of your core components every two weeks. Yes. Wiping. It should be a part of your deploy process in fact. You should be absolutely sure that should you ever need to reinstall under duress that you can get that server back into service in an acceptable amount of time. Screw the yearly DR tests. I'm giving you a world where you can perform bi-monthly DR tests as a matter of standard operation. All it takes is a little bit of up front planning.

The 10 minute maxim

I have a general rule. Anything that has to be done in ten minutes can be afforded twenty minutes to think it through. Obviously, it's a general rule. The guy holding the gun might not give you twenty minutes. And twenty minutes isn't a hard number. The point is that nothing is generally so critical that it has to be SOLVED that instant. You can spend a little more time up front to do things right or you can spend a boatload of time on the backside trying to fix it.

Given the above scenario, you would think I'm being hypocritical or throwing out my own rule. I'm not. The above scenario should have never happened. This is a solved problem. You should have spent 20 minutes actually putting the config file you just changed into puppet instead of making undocumented ad-hoc changes. You should have spent an hour when bringing up the environment to stand up a CM tool instead of just installing the servers and doing everything manually. That's the 10 minute maxim. Take a little extra time now or take a lot of time later.

You decide how much you're willing to spend.

Monday, November 8, 2010

Transitions

I haven't had a chance to mention this but those of you who I'm connected with on LinkedIn are aware that I'm starting with a new company on Wednesday. I'm taking a few days to get some house work done and then diving in. I don't like switching companies in general but I'm really excited about this opportunity. In addition to having almost a blank slate, I'm working with a much smaller team and a chance to contribute back to the community. It's also a chance for me to work in the Atlanta startup scene; something I've been hoping to do for a few years now.

So what about the previous company? Well they're looking to back fill my position. Please feel free to contact me if you're interested. I can put you in touch with the right people. Fair warning, it's a challenging place to work. They'll tell you the same thing. I've blogged about working at a "traditional" company before right here so you can go back and glean information from that.

Tuesday, November 2, 2010

Using Hudson and RVM for Ruby unit testing

As with everything lately, something popped up on Twitter that prompted a blog post. In this case, @wakaleo was looking for any stories/examples for his Hudson book. I casually mentioned I could throw in some notes about how we use Hudson on the Padrino project.

Prerequisites

Here's what you'll need:

I'll leave you to get Hudson working. There are prebuilt packages for every distro under the sun. If you can't get past this step, you'll need to rethink a few things.

Setting up RVM

Once you have it installed, log in as your Hudson user and set up RVM.

RVM Protip - If there are any gems (like say Bundler) that you ALWAYS install, edit .rvm/gemsets/default.gems and .rvm/gemsets/global.gems and add them there. In my examples, I did not do that.

You'll want to go ahead and install all the VMs you plan on testing against. We use 1.8.7, 1.9.1, 1.9.2, JRuby, RBX and REE:

for i in 1.8.7 1.9.1 1.9.2 jruby ree rbx; do rvm install ${i}; done

This will take a while. When it's done, we can now dive into configuring our job in Hudson

What is the Matrix?

So you've got Hudson running and RVM all set up? Open the Hudson console and create a new job of type "Build multi-configuration project". From the job configuration screen, you'll want to set some basics - repository, scm polling and the like. The key to RVM comes under "Configuration Matrix"


The way any user-defined variables work in Hudson, whether a build parameter or matrix configuration, is that you provide a "key" and then a value for that key. The value for that key is accessible to your build steps as a sigil variable. So if your key is my_funky_keyname_here, you can reference $my_funky_keyname_here in your build steps to get that value. With a configuration matrix, each permutation of the matrix provides the value for that key in the given permutation. So if I have:

foo as one axis with 6 values (1, 2, 3 ,4 ,5 ,6) and bar with 3 values (1, 2, 3)

each combination of foo and bar will be available to my build steps as $foo and $bar. The first run will have $foo as 1 and $bar as 1. Second run will have $foo as 2 and $bar as 1. On an on until the combinations are exhausted.

This makes for some REALLY powerful testing matrices. In our case, however, we only need one axis - rubyvm

Hudson Protip - Don't get creative with your axis or parameter names. In our case, we'll be performing shell script steps. Don't call your axis "HOME" because that will just confuse things. Just don't do it.

So now we've added an axis called 'rubyvm' and provided it with values '1.8.7 1.9.1 1.9.2 jruby rbx ree'. As explained, this means that our build steps will iterate over each value of 'rubyvm' for us and repeat our build steps.

Configuring your job

Now that you've got your variables in place, you can write the steps for your job. This took me a little bit of time to work out the best flow. There were some things with how RVM operates with the shell that caught me off-guard initially (the rvm command being a function alias versus an executable). I've broken the test job into three steps:

  • Create my gemset, install bundler and run bundle install/bundle check
  • Run my unit tests
  • Destroy my gemset

In addition to taking advantage of the variable provided by the configuration matrix, we're also going to take advantage of some variables exposed by Hudson in a given job run - $BUILD_NUMBER. Using these two bits of information, we can build a gemset name for RVM that is unique to that run and that ruby vm.

Step 1:

#!/bin/bash -l

rvm use $rubyvm@padrino-$rubyvm-$BUILD_NUMBER --create

gem install bundler

bundle install

bundle check

This uses the --create option of RVM to create our gemset. If our build number is 99 and our ruby vm is ree, we're creating a gemset called padrino-ree-97 for ree. Pretty straightforward.

Next we install bundler and then run the basic bundler tasks. All operations are performed in the workspace for your hudson project. This is typically the root directory of your SCM repository. If the root of your repo doesn't contain your Gemfile and Rakefile, you'll probably want to make your first step a 'cd' to that directory.

The reason for using a full shebang line is to make sure that RVM instantiates properly.

Step 2:

#!/bin/bash -l

rvm use $rubyvm@padrino-$rubyvm-$BUILD_NUMBER

rake test

Each build step is a distinct shell session. For that reason we need to "use" the previously created gemset. Then we run our rake tasks.

Step 3:

#!/bin/bash -l

rvm use $rubyvm@global

rvm --force gemset delete padrino-$rubyvm-$BUILD_NUMBER

This is the "cleanup" step. This cleans up our temporary gemsets that we created for the test run. My understanding was the each step was "independent". Should the middle step fail, the final step would still be executed. This doesn't appear to be the case anymore. For this reason, you'll probably want to occasionally go in and clean up gemsets from failed builds. If your build passes, the gemset will clean itself up. There's probably justification for some sort of "cleanup" job here but I haven't gotten around to trying to pass variables as artifacts to other build steps.

Now you can run the job and watch as Hudson gleefully executes your test cases against each ruby vm. How many of those run concurrently is dependent on how many workers you have configured globally in Hudson.

Unit Testing Protip - One thing you'll find out early on is how concurrent your unit tests REALLY are. In the case of Padrino, ALL of our unit tests were using a hardcoded path (/tmp/sample_project) for testing. My first major step once I got added to the project was to refactor ALL of our tests to make that dynamic so that we could run more than one permutation at a time. You can see an example of how I did that here. Essentially I created an instance variable for our temp directory using UUID.new.generate. It was the quickest way to resolve the problem. If your tests aren't capable of running in parallel, that's one way to address it.

One thing to be aware of: if you have intensive unit tests and your hudson server isn't very powerful, you simply may not have the capacity to run multiple tests at the same time. I had to spin up some worker VMs on other machines around the house to serve as Hudson slave nodes. Our unit tests were actually taking LONGER when we tried to run them in parallel because of the strain of compiling native extension gems and actually running the tests.

Optional profit! step

Code coverage is important. However it makes NO sense to run code coverage tasks on EVERY VM permutation. You only need to run it once (unless you have some VM dependent code in your application). What I've done is take advantage of "Post build actions" to kick off a second job I've defined. This job does nothing but runs our code coverage rake tasks. Steps 1 and 3 are the same as above without the rubyvm variable. Step 2 is different:

#!/bin/bash -l

rvm use 1.8.7@padrino-rcov-$rubyvm-$BUILD_NUMBER

bundle exec rake hudson:coverage:clean

bundle exec rake hudson:coverage:unit

We've broken the coverage tests into a unique rake task so they don't impact normal testing. This creates a code coverage report that's visible in Hudson under that project's page. Currently we don't run the coverage report job unless the primary job finishes.

Wrap up

That's pretty much it in a nutshell. I'm looking to move Hudson to a more powerful VM here at the house as soon as the hardware comes in. I should be able to then run all the tests across all VMs at one time. Screenshots for each of the steps described in this post are available here


Thursday, October 28, 2010

Designed for Developers - Why people keep asking you to use Github

I'll be the first to admit that I'm a Github fanboy. The shocker is that my love of Github has nothing to do with the DVCS underneath. While Git plays a major part of what makes github so great, the bigger reason github is so successful is this:

Github is designed for developers

What do I mean by that? Let's compare a series of screenshots from various code hosting sites:


Code Hosting Solutions comparison

I want you to take a look at the screenshots very carefully especially the "project" pages. What's the one thing you notice about Github compared to the others (excluding BitBucket). What's the focus of the project?

It's all about the code

You'll see quite clearly that with all the sites except for BitBucket, the focus of the project is the code itself. Not only is the focus of the project the code but everything about the code is about the community. I can "watch" a developer or project. I can easily see from the first page how to download the codebase. However the biggest part of what makes Github a success is one button:

Fork

From the start of a project page, not only can I easily browse the code and am provided with the information I need to checkout the code but I'm invited with a single button to become a contributor to that project. Immediately, I'm a potential contributor to that project. If I change something and push the code back to my fork, I can push one button and send a message to the project maintainers asking them to merge the changes back in. As a project maintainer, I have an easy way to evaluate the impact of the change and communicate with the requester and other team members about said change. At the bottom of the pull request page, I'm provided the information on how to easily merge those changes into my main tree.

Designed for Developers

I've been on a bit of a tear lately about usability in developer-targeted products. The latest target of my ire has been Atlassian. Let me clarify that I think Atlassian makes some wonderful products. Confluence is one of the best wikis out there. JIRA is a great issue tracking system for Developers.

However, Atlassian has some "duds" in my opinion. The biggest thorn in my side these days is Bamboo. Bamboo is Atlassian's Continuous Integration server. Like most Atlassian products, its primary target is Java developers. Everything about Bamboo is designed around the Java development toolchain - Maven, Ant and the like. But I don't have a problem with that. What I have a problem with is the over-complication. I grabbed the latest beta of Bamboo at the recommendation of one of the Bamboo developers who heard my rant on Twitter one day. He asked for some feed back and I provided it in a very detailed email. I'm happy to say that the new interface for adding build plans in Bamboo is much simpler than previous versions. I can't do screenshots of our company Bamboo install but previous versions had a VERY complicated multitab build plan configuration.

One point I mentioned in my email is that Bamboo felt like it lacked a focus. Jira was very clearly about Issues. That was the "unit of work". Confluence was very clearly about being a wiki. That was its "unit of work". Bamboo didn't have a singular focus. It was a CI server but what was the unit of work? A build plan? Test results? Fisheye integration? It wasn't clear.

Compare that with Hudson which had a very clear focus. The strength in Hudson is that it performs tasks. Those tasks are typically centered around CI but they don't have to be. In Hudson I can define a job that does nothing more than list directories. I don't even need to back it with a VCS. Bamboo, sadly, in the beta version still hasn't gotten this part right. I can't define a build plan without having a repository somewhere. It still assumes that I want to define all my work inside of an ant script. Using the "shell" builder is still VERY limiting. 

You can see some sample comparison shots between the two here. I'll try to actually setup a repo that Bamboo can use and do a deeper comparison later. 

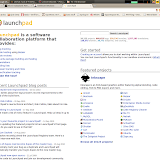
So what's the focus of Google Code, Launchpad...

Going back to code hosting and comparing Github to the others, I think it's clear that they lack a focus. They try to do too much. They "feel" like they were designed by project managers and targeted at them. Maybe it was a faulty assumption that to effectively manage a large project, you had have all of the extra stuff. I don't know. Launchpad and others DO some things better than Github. Issue tracking is one. Github issue tracking is a pretty weak area for them. However here's where Github understands its focus and strengths.

Where Github lacks, it makes up for in integration. Github doesn't TRY to be the project manager's tool. It doesn't try to be a good issue tracker. What it DOES do is say "I suck at this. My focus is on the code and making working with and contributing to the code dead simple. I'll add hooks for the other stuff"

And they do. Github has a boatload of service hooks for everything from issue tracking to project management to irc and IM. They even have a "generic" hook that will submit JSON to a url for you so you can write your own receiver.

About BitBucket, backend technology and focus

I haven't mentioned much about BitBucket. The main reason is that at this point, BitBucket is simple attempting to feature copy from Github except using Mercurial in the background. Sadly, this isn't enough I think. If my only reason for using BitBucket is the DVCS tool then I honestly might as well use Github. I'll get more engagement there. See this quote from Mark Philips from Basho about why the moved from BitBucket to Github:

Why? There are several reasons, the primary of which is that GitHub,

the application, lends itself to more collaboration when developing

open source software. Again, this was a decision made on the basis of

community development; technically-speaking we were satisfied with

what Bitbucket offered.

The issue wasn't the technology. Mercurial and Git are pretty much at feature parity (as is Bazaar). One thing mercurial doesn't do out of the box is cherry picking but it's supported with extra configuration. Mercurial has hg incoming which let's you see what people are working on. Git has staging. Mercurial has better Windows support than Git. It's really six in one, half dozen in the other.

However what BitBucket DOESN'T have is the community. You see, BitBucket was playing catchup to Github. Simply copying the social aspects of Github isn't enough. Github has too much momentum precisely because they had the focus right from the start - code is king.

As a developer, my key focus is my code. It's what says the most about me. As a developer who wants to attract other developers, the best way to do that is showing the code and making that contribution as easy as possible. Github gets that.

That's why people keep asking you to switch to Github.